Over time, walls may develop cracks or fissures due to factors like settling foundations, temperature fluctuations, or structural movements. Addressing these issues promptly not only enhances the aesthetic appeal of your home but also prevents potential structural concerns.
Identifying the Type of Damage:
- Scratches: Shallow marks affecting only the paint or plaster, typically less than 1 centimeter deep.
- Fissures: Deeper than scratches, ranging from 1 to 3 centimeters, possibly indicating slight structural shifts.
- Cracks: Significant openings deeper than 3 centimeters, often pointing to substantial structural issues.
When to Proceed with DIY Repairs:
- Scratches and Minor Fissures: Generally safe to repair yourself, especially if they don’t penetrate deeply into the wall structure.
- Major Cracks: Recommend consulting a professional to assess and address potential underlying structural problems.
Materials Needed:
- Utility knife
- Joint compound or plaster filler
- Putty knife
- Sandpaper (medium and fine-grit)
- Primer and paint
- Painter’s tape (optional)
Step-by-Step Repair Process:
- Preparation:
- Wear safety glasses and gloves to protect against debris and dust.
- Remove any loose paint, dust, or debris from the damaged area using a utility knife or brush.
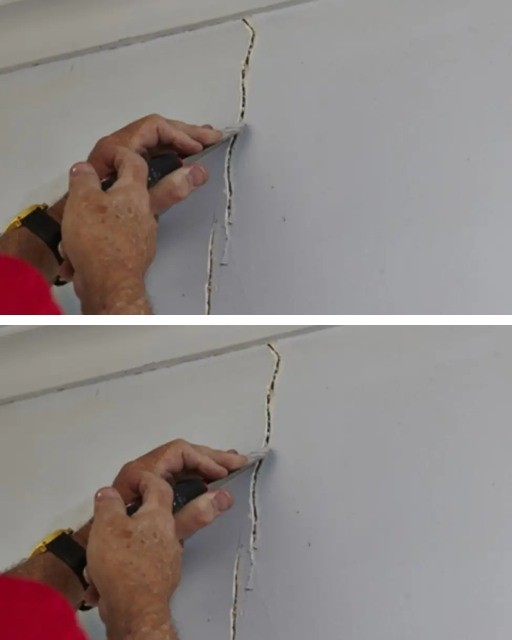
- Widen the Crack (For Deeper Fissures and Cracks):
- Gently cut along the length of the crack with a utility knife to create a V-shaped groove. This allows for better adhesion of the repair material.
- Apply the Repair Material:
- For Drywall: Use a joint compound suitable for drywall repairs. Using a putty knife, apply the compound into the groove, ensuring it’s slightly overfilled to compensate for shrinkage.
- For Plaster: Use a plaster filler recommended for wall repairs. Apply the filler into the groove, ensuring it’s slightly overfilled.
- Smooth and Level:
- Once the repair material is applied, use the putty knife to smooth the surface, ensuring it’s level with the surrounding wall.
- Allow the material to dry as per the manufacturer’s instructions.
- Sand the Area:
- After drying, lightly sand the repaired area with medium-grit sandpaper to remove any imperfections.
- Follow up with fine-grit sandpaper for a smooth finish.
- Prime and Paint:
- Apply a primer to the repaired area to seal the surface and promote paint adhesion.
- Once the primer dries, paint over the area to match the rest of the wall.
Additional Tips:
- Use Plaster Tape for Reinforcement: For larger fissures, consider applying plaster tape over the repair before adding the compound to reinforce the area and prevent future cracking.
- Regular Maintenance: Periodically inspect your walls for new cracks or fissures and address them promptly to maintain the integrity and appearance of your home.
By following these steps, you can effectively repair minor wall damages, restoring both the functionality and beauty of your living space.